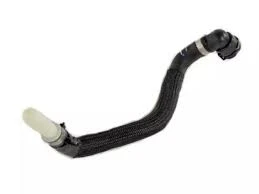
Universal Motorcycle Brake Lines for Enhanced Performance and Safety During Rides
Dec . 25, 2024 00:22 Back to list
Universal Motorcycle Brake Lines for Enhanced Performance and Safety During Rides
Understanding Universal Motorcycle Brake Lines Importance and Installation
When it comes to the safety and performance of motorcycles, few components are as critical as the brake system. Among the various parts constituting this system, brake lines play a vital role in ensuring effective braking performance. Universal motorcycle brake lines are an excellent option for riders seeking to upgrade, replace, or customize their braking systems. This article delves into the significance of these components, their advantages, and the installation process.
What Are Universal Motorcycle Brake Lines?
Universal motorcycle brake lines are flexible tubing designed to transport hydraulic fluid from the brake lever to the brake caliper. These lines are often made from high-quality materials such as stainless steel or reinforced rubber, which provide durability and resistance to heat and wear. The term universal implies that these lines can fit a variety of motorcycle models, making them a popular choice for both aftermarket modifications and general replacements.
Why Upgrade to Universal Brake Lines?
1. Enhanced Performance Standard brake lines can expand under pressure, leading to a spongy brake feel and decreased responsiveness. Universal motorcycle brake lines, particularly those made from stainless steel, resist expansion. This means that your braking system will deliver improved performance, allowing for more precise control.
2. Increased Durability Universal brake lines are designed to stand up to the rigors of motorcycle riding. They are less likely to corrode and can better withstand exposure to harsh elements, oils, and brake fluids. This durability ensures a longer lifespan and reduces the frequency of replacements.
3. Better Aesthetics Many riders choose to customize their bikes for a personal flair. Universal motorcycle brake lines come in various styles, colors, and finishes, allowing for visual upgrades that can enhance your bike’s overall appearance.
4. Cost-Effectiveness In many cases, universal lines are more affordable than OEM (Original Equipment Manufacturer) parts, making them an attractive option for budget-conscious riders looking to improve their bike's braking system.
Installation Process
Gather Necessary Tools
Before you start, ensure you have all the tools required for the installation. These typically include
- Brake fluid - Wrenches (metric and imperial sizes) - Line cutter - Hose clamps - Safety goggles - Cleaning cloths
Step 1 Safety First
universal motorcycle brake lines

Before working on your motorcycle, ensure it is stable and secure. Use a motorcycle stand to keep it upright. Wear safety goggles to protect your eyes from fluids.
Step 2 Remove Old Brake Lines
Start by locating the brake line you intend to replace. Use the appropriate wrench to disconnect the line from the brake caliper and the brake master cylinder. Keep a container handy to catch any fluid that may escape during this process.
Step 3 Prepare New Lines
If you're using universal brake lines, measure the length needed and cut them accordingly. Ensure your cuts are straight to prevent leaks. Install any necessary fittings according to the manufacturer’s instructions.
Step 4 Install New Brake Lines
Connect the new lines to the brake caliper and the master cylinder. Tighten the fittings securely, but be careful not to overtighten, as this can lead to damage.
Step 5 Bleed the Brake System
After the new lines are in place, you need to bleed the brake system to remove any air bubbles. This is crucial for ensuring optimal brake performance. Follow the manufacturer's instructions for the bleeding process, which typically involves pulling the brake lever while releasing the bleed valve.
Step 6 Test Your Brakes
Before taking your motorcycle on a ride, it’s essential to test the brakes. Make sure the lever feels firm and responsive. If everything appears in order, you’re ready to hit the road!
Conclusion
Upgrading to universal motorcycle brake lines can significantly impact your bike’s performance and safety. By enhancing durability and responsiveness, riders can enjoy a more controlled and confident riding experience. With the right tools and a careful approach to installation, this upgrade can be a rewarding DIY project, allowing you to enjoy the open road with peace of mind. Always remember, safety should be your top priority, and never hesitate to consult a professional if you're unsure about any aspect of the installation process.
