
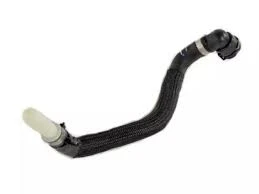
fixing a brake line
اکتوبر . 03, 2024 16:32 Back to list
fixing a brake line
Fixing a Brake Line A Step-by-Step Guide
Maintaining your vehicle’s braking system is crucial for safety, and one common repair that many car owners may face is fixing a brake line. Brake lines are essential for transmitting hydraulic pressure to the brakes, allowing your vehicle to stop effectively. Over time, these lines can become corroded, cracked, or damaged, leading to brake fluid leaks and diminished braking performance. If you suspect a problem with your brake lines, here’s how you can fix them safely and effectively.
1. Gather Your Tools and Materials
Before you begin, ensure you have all the necessary tools and materials. You’ll need a jack and jack stands, a wrench set, brake line tubing, a tube cutter, brake fluid, and possibly a flare nut wrench. Safety gear, including gloves and goggles, is also essential to protect yourself during the repair.
2. Safety First
Start by parking your vehicle on a level surface and engaging the parking brake. Wear safety gloves and goggles to protect yourself from brake fluid, which can irritate the skin. Once you’re prepared, use the jack to lift the vehicle and secure it with jack stands.
3. Locate the Damaged Brake Line
Inspect the brake lines visually. Look for any signs of rust, corrosion, or leaks in the brake lines. Once you’ve identified the damaged section, take note of its location as you’ll be removing that part.
4. Removing the Old Brake Line
fixing a brake line
Use a wrench to loosen the fittings at both ends of the damaged brake line. Be prepared for some brake fluid to escape; have a container ready to catch it. Once the fittings are detached, you can use a tube cutter to remove the affected section of the brake line.
5. Installing the New Brake Line
Measure and cut the new brake line to the appropriate length, ensuring you have a slight amount of extra length to work with. Attach the new line to the existing brake lines using the fittings, making sure to tighten them securely but be careful not to overtighten, as this could damage the threads.
6. Bleed the Brake System
After installing the new brake line, it’s important to bleed the brake system to eliminate any air bubbles that could compromise braking performance. You can do this by having a partner pump the brake pedal while you open and close the bleeder valve on each brake caliper or cylinder.
7. Test Your Brakes
Once you’ve completed the repair and bled the brake system, check for any leaks and ensure everything is secure. Start your vehicle and gently test the brakes at low speeds to ensure they’re functioning correctly.
Fixing a brake line can save you both time and money, and it is a rewarding DIY project. However, if you feel unsure or encounter significant issues, it’s best to consult a professional mechanic to ensure your vehicle remains safe on the road.