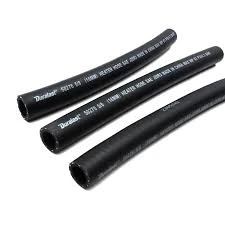
connecting brake lines
నవం . 17, 2024 14:02 Back to list
connecting brake lines
Understanding and Connecting Brake Lines A Comprehensive Guide
Brake lines play a crucial role in the safety and functionality of any vehicle. They are part of the hydraulic braking system that converts the force applied to the brake pedal into stopping power. Understanding how to connect brake lines correctly is essential for anyone interested in automotive maintenance or repair. This article explores the importance of brake lines, the process of connecting them, and the tools required.
The Importance of Brake Lines
Brake lines are responsible for transferring brake fluid from the master cylinder to the brake calipers or wheel cylinders. This hydraulic system amplifies the force from your foot on the brake pedal, enabling your vehicle to stop safely and efficiently. A malfunctioning brake line can lead to various issues, including brake fluid leaks, compromised brakes, and, ultimately, unsafe driving conditions.
Regular inspection of brake lines is vital, as they can wear out or corrode over time. Signs of worn or damaged brake lines include spongy brakes, a warning light on the dashboard, or fluid leaks beneath the vehicle. If you notice any of these signs, it's crucial to address the issue immediately.
Tools and Materials Needed
Before connecting brake lines, ensure you have the right tools and materials
1. Brake Line Tubing Generally made of copper, aluminum, or steel. Choose the appropriate type based on your vehicle's specifications. 2. Fittings These come in various shapes and sizes and are designed to connect two brake lines securely.
3. Bending Tool This tool helps shape the brake line to fit specific pathways in your vehicle, preventing kinks and ensuring a smooth flow of brake fluid.
4. Flaring Tool Used to create a flared end on the brake line, which helps form a tight seal when connecting it to fittings.
5. Wrenches and Ratchets To tighten and loosen fittings and bolts.
6. Brake Fluid Always have the correct type of brake fluid on hand for your vehicle.
connecting brake lines

The Process of Connecting Brake Lines
1. Preparation Start by ensuring the vehicle is securely lifted if necessary. Remove any components obstructing access to the brake lines.
2. Removing Old Brake Lines If replacing old lines, gently disconnect them using the appropriate tools. Be cautious about brake fluid spills, as they can damage vehicle paint.
3. Bending and Cutting Measure the length of the new line needed, then cut the tubing with a cutter. Use a bending tool to create the necessary shapes without kinking the line.
4. Flaring the Ends Use a flaring tool to create a proper flare at the ends of the brake line. This step is crucial for ensuring a leak-free connection.
5. Connecting the Lines Attach the new brake line to the fittings, ensuring that each connection is secure but not overtightened, as this can lead to damage.
6. Refilling Brake Fluid Once the lines are connected, refill the braking system with brake fluid, following your vehicle’s specifications.
7. Bleeding the Brakes To remove any air bubbles trapped in the system, you’ll need to bleed the brakes. This involves opening the bleeder valve on the caliper while someone depresses the brake pedal.
8. Testing After everything is connected and bled, test the brakes in a controlled environment to ensure proper functionality.
Conclusion
Connecting brake lines is a critical skill for any automotive enthusiast or professional. Understanding the importance and proper techniques for handling brake lines ensures enhanced safety and performance of your vehicle. Always prioritize safety by using the right tools and following guidelines. If in doubt, consult a professional to avoid compromising your vehicle's braking system.
