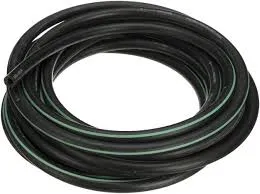
fixing a leaking brake line
செப் . 25, 2024 19:42 Back to list
fixing a leaking brake line
Fixing a Leaking Brake Line A Step-by-Step Guide
A leaking brake line is a serious issue that can compromise your vehicle's safety. Brakes are crucial for safe driving, and any loss of hydraulic fluid can lead to brake failure. If you notice signs of a brake line leak, such as brake fluid spots under your vehicle or a spongy brake pedal, it’s essential to address the problem promptly. Here’s a step-by-step guide on how to fix a leaking brake line.
Tools and Materials Needed
Before you start the repair, make sure you have the following tools and materials
- Brake line tubing - Flaring tool kit - Brake fluid - Wrenches and ratchet set - Brake line cutter - Safety goggles and gloves - Jack and jack stands
Step 1 Safety First
Begin by ensuring your vehicle is parked on a flat surface. Engage the parking brake and wear safety goggles and gloves to protect yourself from brake fluid and sharp edges.
Step 2 Locate the Leak
Inspect the brake lines carefully. Look for wet spots, corrosion, or damage along the brake lines. A leak can often be found near the connections or where the line has been pinched or damaged.
Step 3 Remove the Damaged Line
Once you've located the leak, use a wrench to disconnect the brake line from the brake caliper and the master cylinder. Be prepared for some brake fluid to leak out. Use the brake line cutter to carefully cut away the damaged section of the line.
fixing a leaking brake line

Step 4 Prepare the New Line
Using a new brake line tubing, measure the length needed to replace the damaged section. Cut the brake line to the correct length, ensuring the edges are smooth to prevent leaks. Use the flaring tool to create a proper flare at the end of the new line, which is essential for secure connections.
Step 5 Install the New Line
Attach one end of the new brake line to the brake caliper and the other end to the master cylinder. Tighten the connections securely using a wrench, but be careful not to overtighten, as this can damage the fittings.
Step 6 Bleed the Brakes
After installing the new line, it’s essential to bleed the brakes to remove any air from the system. You can do this by having a friend pump the brake pedal while you open and close the bleeder valve on the brake caliper. Repeat this process until you see a steady stream of brake fluid without bubbles.
Step 7 Test the Brakes
Finally, check the brake fluid level and add more if necessary. Start the vehicle and pump the brakes a few times to ensure they feel firm. Before driving, test the brakes in a safe area to confirm they are functioning correctly.
Conclusion
Fixing a leaking brake line can be a straightforward process if you follow these steps carefully. However, if you’re uncomfortable with any part of the repair, it’s always best to consult with a professional mechanic. Safety should never be compromised when it comes to your vehicle’s braking system.
