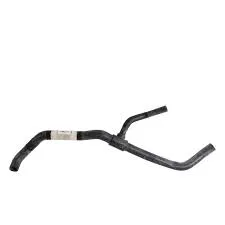
Creating Custom Brake Lines for Enhanced Vehicle Performance and Safety
Nov . 07, 2024 09:51 Back to list
Creating Custom Brake Lines for Enhanced Vehicle Performance and Safety
Making New Brake Lines A Step-by-Step Guide
Brake lines are crucial components of any vehicle's braking system, responsible for transferring hydraulic pressure from the master cylinder to the brake calipers or wheel cylinders. Over time, these lines can corrode, become damaged, or even leak, leading to potential safety hazards. If you're a DIY enthusiast or just looking to save on repair costs, making new brake lines can be a rewarding project. This guide provides a comprehensive overview of the materials, tools, and steps necessary to make your own brake lines.
Materials Needed
1. Brake Line Tubing The most common material is copper-nickel tubing or steel tubing, with copper-nickel being preferred for its resistance to corrosion. 2. Brake Line Fittings Ensure that you have the correct fittings for your vehicle; these usually come in brass or steel. 3. Brake Fluid Dot 3 or Dot 4 brake fluid, depending on your vehicle’s requirements. 4. Brake Line Bender This tool helps make clean, precise bends. 5. Pipe Cutter To cut the tubing to the desired length. 6. Flaring Tool Used to create a flared end on the brake line tubing to ensure a proper seal with the fittings. 7. Wrenches For tightening the fittings onto the brake components.
Tools You’ll Need
- Safety Glasses and Gloves Always prioritize safety when working with automotive parts. - Measuring Tape To measure the length of the brake lines required. - Marker For marking the tubing before cutting. - Ruler or Straight Edge To ensure straight cuts and bends.
Step-by-Step Process
Step 1 Assess the Current Brake Lines
Before you start making new brake lines, it’s essential to assess the existing brake lines. Look for signs of bulging, corrosion, or any leaks. Take note of the lengths and bends needed to create the new lines effectively.
Step 2 Measure and Cut the Tubing
Using the measuring tape, determine the lengths of the new brake lines. When measuring, allow a little extra length for bends and fittings. Mark the tubing with a marker where you intend to cut it. Use the pipe cutter to make a clean, straight cut.
Step 3 Create Flare Ends
Once the tubing is cut, you will need to create flared ends using the flaring tool. Follow the manufacturer’s instructions to ensure proper flaring. A secure flare is crucial to maintain a leak-free connection with the fittings.
making new brake lines

Step 4 Bend the Tubing
Utilizing the brake line bender, carefully bend the tubing at the required angles. It’s essential to make smooth bends to avoid kinks in the tubing, which could restrict fluid flow and compromise brake performance.
Step 5 Install the Fittings
With the flares created and the tubing bent, it’s time to attach the fittings. Thread the fittings onto the flared ends of the brake line. Ensure they are hand-tight before using a wrench to tighten them further. Be careful not to over-tighten, as this can damage the fittings or the tubing.
Step 6 Routing the Brake Lines
Route the new brake lines through the vehicle’s frame or along the original path of the old lines. Ensure that they are secured and protected from rubbing against sharp edges. Use brackets or rubber grommets as necessary.
Step 7 Bleed the Brakes
After installing the new brake lines, it’s essential to bleed the brakes to remove any air bubbles in the system. This process involves having someone assist you by pressing the brake pedal while you open and close the bleeder screws on the brake calipers.
Step 8 Test Drive
Once everything is installed and bleed, conduct a test drive to ensure that the brakes are functioning correctly. Pay attention to the pedal feel; it should be firm, not spongy. If there are any issues, check for leaks and ensure every connection is tight.
Conclusion
Making new brake lines is not only a practical skill for car maintenance but also a way to enhance your understanding of your vehicle’s braking system. By following these steps and working carefully, you can ensure that your brake system is safe and reliable. Always remember to prioritize safety and consult a professional if you’re uncertain about any aspect of the process. Happy wrenching!
