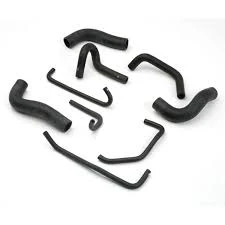
installing brake lines
നവം . 05, 2024 15:47 Back to list
installing brake lines
Installing Brake Lines A Comprehensive Guide
When it comes to vehicle safety, the importance of functional brake systems cannot be overstated. Brake lines play a crucial role in ensuring that the hydraulic system works effectively to bring your vehicle to a halt. Over time, these lines can degrade, leading to leaks or failures that can put you and other road users at risk. If you find yourself in need of replacing brake lines, this guide will help you navigate through the installation process.
Understanding Brake Lines
Brake lines are part of your vehicle's braking system, transporting hydraulic fluid from the master cylinder to the brakes at each wheel. They can be made from various materials, including rubber, which is flexible and offers some degree of shock absorption, or metal, which is more durable and resistant to damage. When installing new brake lines, it's crucial to consider the material that best suits your vehicle’s needs and driving conditions.
Tools and Materials Required
Before diving into the installation process, it's essential to gather all necessary tools and materials
. Here’s a checklist1. New brake lines (rubber or steel) 2. Brake line bending tool 3. Flare nut wrench set 4. Line cutter 5. Brake fluid 6. Clean rags 7. Safety glasses and gloves
Installation Steps
installing brake lines

1. Safety First Ensure your vehicle is parked on a level surface, and set the parking brake. It’s advisable to work with safety glasses and gloves to protect yourself during the process.
2. Remove the Old Brake Lines Use the flare nut wrench to carefully loosen the fittings on the brake lines. Start at the wheel end and work your way up to the master cylinder. Use a line cutter to remove any old lines if they are too corroded or damaged to unscrew.
3. Prepare the New Brake Lines Measure the lengths of the old brake lines and cut the new lines to the appropriate lengths. When using steel lines, a brake line bending tool can help to create sharp bends without crumpling the line.
4. Install the New Lines Start connecting the new brake lines, ensuring that the fittings are tight but do not over-torque them, which can lead to damage. Be sure to route the lines in the same manner as the old ones to avoid any interference with moving parts.
5. Bleed the Brake System After all new lines are installed, it’s essential to bleed the brake system to remove any air bubbles that may have entered. Start at the wheel furthest from the master cylinder, and have an assistant pump the brake pedal while you open and close the bleeder valve.
6. Check for Leaks Once everything is reassembled, fill the brake fluid reservoir and visually inspect each connection for any signs of leakage. Pump the brake pedal a few times to ensure proper pressure and responsiveness.
Conclusion
Installing brake lines is a vital process that requires attention to detail and proper safety measures. While it may seem daunting, with the right tools and careful execution, you can successfully replace brake lines and ensure your vehicle is safe and roadworthy. Always remember the significance of maintaining your braking system, as it directly impacts your safety and the safety of others on the road. If you feel uncertain at any step of the process, don't hesitate to consult a professional mechanic.
