
How to Replace Rubber Brake Lines for Improved Vehicle Safety and Performance
Ное . 01, 2024 19:57 Back to list
How to Replace Rubber Brake Lines for Improved Vehicle Safety and Performance
Replacing Rubber Brake Lines A Comprehensive Guide
Brake lines are an essential part of any vehicle's braking system. They transport brake fluid from the master cylinder to the brakes, enabling the vehicle to stop effectively. Over time, these lines can deteriorate, especially if they are made of rubber. Understanding the importance of replacing rubber brake lines can enhance safety and improve your vehicle's performance.
Why Replace Rubber Brake Lines?
Rubber brake lines are susceptible to a variety of issues. They can become brittle and crack over time due to exposure to heat, moisture, and road contaminants. This deterioration can lead to brake fluid leaks, reducing the hydraulic pressure necessary for effective braking. A compromised brake line can significantly increase stopping distances and may even result in complete brake failure in extreme cases. Therefore, regular inspection and timely replacement of rubber brake lines are crucial for maintaining vehicle safety.
Signs You Need to Replace Brake Lines
1. Visible Cracks If you notice any cracks or fraying on the rubber lines, it is a clear indication that they should be replaced.
2. Leaking Fluid Puddles of brake fluid under your vehicle or a low brake fluid warning light on your dashboard are both signs that your brake lines may be compromised.
4. Corrosion Inspect the fittings and ends of the brake lines for rust or corrosion, which can weaken the integrity of the lines.
The Replacement Process
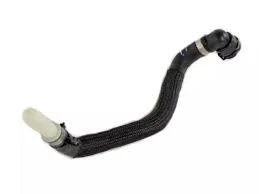
replacing rubber brake lines
Replacing rubber brake lines is a task that can be tackled by someone with a moderate level of mechanical knowledge. Here’s a simple step-by-step guide
1. Gather Tools and Materials Before you begin, make sure you have the necessary tools a wrench, brake line tubing cutter, flare nut wrench, and a brake line flaring tool. You'll also need replacement brake lines, brake fluid, and a clean rag.
2. Lift the Vehicle Use a car jack to safely lift the vehicle and secure it with jack stands.
3. Remove the Old Brake Lines Locate the rubber brake lines and carefully disconnect them from the calipers and the master cylinder. Be cautious as brake fluid can leak out, so have a rag handy.
4. Install the New Brake Lines Measure and cut the new lines to the correct length. Use the flare nut wrench to securely attach the new lines to the calipers and master cylinder.
5. Bleed the Brake System Once the new lines are installed, you must bleed the brake system to remove any air pockets. This ensures that the brakes will function correctly. Follow the proper procedure for bleeding brakes, which usually involves having an assistant pump the brake pedal while you loosen the bleeder screw.
6. Check for Leaks Before taking your vehicle for a test drive, check all connections for leaks by pumping the brakes a few times.
Conclusion
Replacing rubber brake lines is an essential part of vehicle maintenance that should not be overlooked. By paying close attention to the signs of wear, motorists can ensure their safety on the road. Whether you choose to DIY or seek professional help, keeping your brake system in good condition is vital for your vehicle's performance and safety. Remember, when it comes to brakes, it’s better to be proactive than reactive.