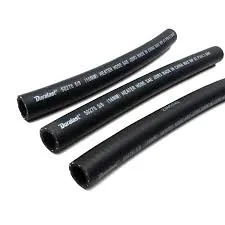
replacing a power steering line
ກ.ຍ. . 22, 2024 18:54 Back to list
replacing a power steering line
Replacing a power steering line can be a fulfilling yet challenging task for car enthusiasts and those looking to save on repair costs. The power steering system is essential for allowing drivers to steer their vehicles with ease, especially at low speeds. When a power steering line gets damaged or develops leaks, it’s crucial to address the issue promptly to ensure safe and efficient vehicle operation. This article provides a comprehensive guide on how to replace a power steering line effectively.
Understanding Power Steering Lines
Power steering lines are tubes that carry hydraulic fluid from the power steering pump to the steering gear or rack, allowing for smooth movement of the steering wheel. There are typically two types of lines high-pressure lines and low-pressure return lines. High-pressure lines transport fluid from the pump, while the return lines direct fluid back to the pump. Leaks in either line can lead to loss of fluid, causing the power steering system to fail, resulting in increased steering effort and potential damage to other components.
Gathering Necessary Tools and Materials
Before starting the replacement process, it's essential to gather the right tools and materials. You will need
- A new power steering line (ensure it’s compatible with your vehicle’s make and model) - Wrenches and socket sets - Screwdrivers - Pliers - A fluid catch pan - Replacement power steering fluid - Safety glasses and gloves
Step-by-Step Replacement Process
1. Safety First Start by ensuring your vehicle is on a flat surface, and set the parking brake. Wearing safety glasses and gloves will protect you from fluid exposure and any potential sharp edges.
2. Locate the Power Steering Lines Open the hood and locate the power steering pump. Trace the lines connected to it, noting which line needs replacement. It's typically best to replace both lines if one has failed, as they may be of similar age and wear.
replacing a power steering line

3. Drain the Fluid Place a fluid catch pan under the power steering pump. Carefully disconnect the lines using the appropriate wrenches. Be prepared for some fluid to spill; catching it will minimize mess.
4. Remove the Old Line Once the connections are loose, gently pull the old line out. Depending on the vehicle, you may need to remove some brackets or components for better access.
5. Install the New Power Steering Line Take the new line, ensuring it matches the fittings of the old line. Carefully route it in the same path as the original, avoiding any contact with moving parts or hot engine components.
6. Reconnect and Tighten Securely connect the new line to the pump and rack. Ensure all fittings are tight to prevent leaks while being careful not to overtighten, which could damage the components.
7. Refill Power Steering Fluid After installing the new line, refill the power steering reservoir with the appropriate type of power steering fluid. Check your owner’s manual for specifications.
8. Bleed the System Start the vehicle and turn the steering wheel from lock to lock several times to remove any air bubbles from the system. Check for any signs of leakage around the new line.
Conclusion
Replacing a power steering line can be a straightforward DIY project if you approach it methodically. By following the steps outlined above, you not only save on labor costs but also gain a deeper understanding of your vehicle's systems. Always remember to monitor the power steering fluid level regularly and address any leaks promptly to keep your power steering functioning efficiently. Happy motoring!
