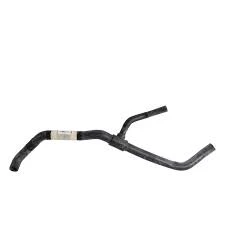
replacing rear brake lines
11月 . 24, 2024 00:25 Back to list
replacing rear brake lines
Replacing Rear Brake Lines A Step-by-Step Guide
Brake lines are crucial for your vehicle's safety, ensuring that the braking system functions effectively. Over time, these lines can corrode or develop leaks, leading to reduced braking performance. If you notice a spongy brake pedal, a fluid leak, or something amiss with your braking system, it may be time to replace your rear brake lines. While this task can seem daunting, with the right tools and guidance, you can tackle it yourself. Here’s a comprehensive step-by-step guide on how to replace your rear brake lines.
Tools and Materials Needed
Before you begin, gather the necessary tools and materials
- New brake lines (specific to your vehicle model) - Brake line flaring tool - Brake line cutter - Wrenches (metric and standard) - Combination or flare nut wrench - Brake fluid - Catch container for old brake fluid - Safety goggles and gloves - Rags for cleaning
Step 1 Safety First
Park your vehicle on a flat surface and engage the parking brake. For safety, wear safety goggles and gloves. If necessary, lift the rear of the vehicle with jack stands to access the brake lines more comfortably.
Step 2 Identify the Brake Lines
Locate the rear brake lines that need replacing. These lines typically run from the brake master cylinder to the rear brake caliper. Carefully inspect them for signs of wear, corrosion, or leaks.
Step 3 Remove the Old Brake Lines
Using the appropriate wrenches, start by loosening the fittings on the brake lines. Be sure to have a catch container underneath to collect any dripping brake fluid. Carefully unscrew the fittings, taking care not to damage the surrounding components. Once the fittings are removed, use a brake line cutter to cut the old line in a straight manner, making it easier to install the new line.
replacing rear brake lines

Step 4 Prepare the New Brake Lines
Cut your new brake lines to the desired length using the brake line cutter. Use the flaring tool to create a proper flare at the ends of the new lines, ensuring a secure fit when attached to the brake system. It’s essential to ensure that your flares are clean and smooth to avoid leaks.
Step 5 Install the New Brake Lines
With the new brake lines prepared, carefully route them just as the old lines were positioned, ensuring that they do not come into contact with any moving parts or exhaust components. Attach the new lines to the brake caliper or fitting and tighten securely with a flare nut wrench. Repeat this process for each line being replaced.
Step 6 Bleed the Brake System
Once the new brake lines are in place, it’s vital to bleed the brake system to remove any air that may have entered during replacement. Start at the brake furthest from the master cylinder and work your way forward. This process typically involves having a partner pump the brake pedal while you open and close the bleeder valve on each wheel, monitoring the fluid flow until no bubbles appear.
Step 7 Check the System
After bleeding the brakes, check for any leaks around your new connections. Once everything looks secure, press the brake pedal to ensure that it feels firm and responsive. Refill the brake fluid reservoir as needed.
Conclusion
Replacing rear brake lines is a task that can enhance the safety of your vehicle significantly. By following these steps and taking your time, you can successfully replace old, worn-out brake lines. Always remember, if you're unsure about any step of the process, it's best to consult with a professional mechanic. Prioritizing safety will ensure that your vehicle is ready for the road ahead.
