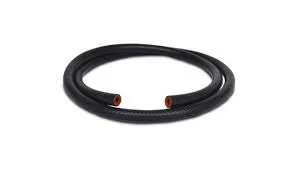
replacing a brake hose
ডিসে. . 20, 2024 07:21 Back to list
replacing a brake hose
Replacing a Brake Hose A Step-by-Step Guide
Maintaining your vehicle's braking system is crucial for safety and performance. Among the various components involved, the brake hose is often overlooked. This article will guide you through the process of replacing a brake hose, ensuring you understand the importance of this task and how to execute it safely and effectively.
Understanding the Brake Hose
The brake hose is a flexible link that transmits brake fluid from the brake line to the brake caliper. It is designed to expand and contract, allowing for smooth braking. Over time, brake hoses can deteriorate due to factors like weather exposure, heat, and wear. A faulty brake hose can lead to reduced braking power and even complete brake failure, making timely replacement essential.
Tools and Materials Needed
Before you begin the replacement process, ensure you have the following tools and materials
- New brake hose - Brake fluid - Wrench set - Brake line wrench (for stubborn fittings) - Hose clamps (if necessary) - Bucket or basin (to catch any leaking brake fluid) - Safety glasses - Gloves - Jack and jack stands or ramps
Step 1 Safety First
Prior to starting the job, ensure your vehicle is parked on a flat surface. Engage the parking brake and wear safety glasses and gloves to protect yourself from brake fluid, which is corrosive. If you need to lift your vehicle, do so with jack stands or ramps, ensuring it is secure.
Step 2 Identify the Brake Hose
Locate the brake hose under your vehicle. It typically runs from the brake line to the brake caliper. Familiarize yourself with the layout of your vehicle’s braking system, as this will make the process easier.
Step 3 Remove the Old Brake Hose
1. Relieve Brake Fluid Pressure Before removing any components, relieve pressure from the brake system. You can do this by carefully opening the brake fluid reservoir cap and pressing the brake pedal a few times.
2. Place a Bucket Position a bucket or basin beneath the brake hose to catch any leaking brake fluid.
3. Disconnect the Hose Using your wrench, carefully remove the bolt that secures the brake hose to the brake caliper. Follow this by disconnecting the hose from the brake line. It may be helpful to use a brake line wrench here to avoid stripping the fitting.
4. Remove the Hose Once disconnected, remove the old hose from its mounting bracket. Check for any signs of wear or damage on surrounding components as well.
replacing a brake hose

Step 4 Install the New Brake Hose
1. Position the New Hose Take your new brake hose and place it in the same position as the old one, ensuring it follows the correct routing to avoid kinks.
2. Connect the Hose Attach one end of the new hose to the brake caliper and tighten the fitting securely. Be careful not to overtighten, as this can damage the fitting or hose.
3. Attach to the Brake Line Next, connect the other end to the brake line, ensuring it is tightened and secure.
4. Reposition and Secure If your vehicle’s brake hose is held by clamps or brackets, ensure it is properly secured in place.
Step 5 Bleed the Brake System
After successfully installing the new brake hose, it is crucial to bleed the brake system to remove any air that may have entered.
1. Locate the Bleeder Valve This is usually found on the brake caliper.
2. Attach a Hose Attach a clear plastic hose to the bleeder valve, with the other end placed into your bucket to catch fluid.
3. Open the Valve Have an assistant pump the brake pedal several times, then hold the pedal down. Open the bleeder valve to let fluid and air escape. Close the valve and have your assistant release the brake pedal. Repeat this process until no air bubbles are seen in the fluid.
4. Check Fluid Levels Regularly check the brake fluid reservoir and refill as necessary during the bleeding process.
Step 6 Final Checks
Once you have completed the bleeding process, visually inspect all connections to ensure they are secure. Lower your vehicle and take it for a short test drive to check for any unusual sounds or behavior during braking. It’s always a good idea to double-check the brake fluid level after the test drive and top it off if needed.
Conclusion
Replacing a brake hose is an essential maintenance task that can significantly impact your vehicle's safety and performance. By following this step-by-step guide, you can ensure that your braking system remains effective and reliable. Always consult your vehicle's manual for specific instructions related to your make and model, and when in doubt, consider seeking professional assistance. Safe driving starts with a well-maintained vehicle!
Latest news
-
Seven-Layer Winding A/C Hose Type C-HEBEI KEMO AUTO PARTS TECHNOLOGY CO., LTD|Low Permeability&High Durability
NewsAug.29,2025
-
Seven-Layer Type C A/C Hose-HEBEI KEMO AUTO PARTS TECHNOLOGY CO., LTD|Automotive Air Conditioning Solutions
NewsAug.29,2025
-
Durable Automotive Fuel Line: Car, Diesel & E85 Hoses
NewsAug.27,2025
-
Automotive Fuel Line & Hose Solutions | E85 & Diesel Ready
NewsAug.26,2025
-
Reliable Automotive Fuel Line | E85 & Diesel Compatible
NewsAug.25,2025
-
Durable Car Heater Hose | Quality Automotive Preheater Pipes
NewsAug.24,2025
