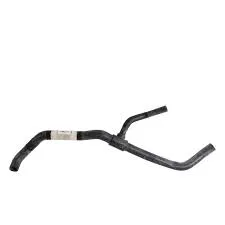
making brake pipes
окт. . 30, 2024 14:33 Back to list
making brake pipes
Making Brake Pipes A Step-by-Step Guide to Ensuring Safety and Performance
Brake pipes are an essential component in any vehicle's braking system, ensuring that hydraulic fluid flows from the master cylinder to the brake calipers. Properly functioning brake pipes are critical for vehicle safety, which is why it's important to understand how to make and maintain them. This article provides a comprehensive guide to making brake pipes, covering the materials needed, the tools required, and the steps involved in the process.
Materials Needed
1. Brake Pipe Tubing The most commonly used material is copper or Kunifer (a blend of copper and nickel). Kunifer is favored for its corrosion resistance and flexibility. 2. Brake Fittings These include unions, elbows, and connectors that are compatible with your vehicle's braking system. 3. Brake Fluid Ensure that you have the correct type of brake fluid for your vehicle. This is crucial once the brake pipes are installed.
Tools Required
- Tube bender To achieve precise bends without kinking the pipe. - Tube cutter For clean, straight cuts. - Flare tool To create proper flares at the pipe ends for secure connections. - Wrenches For tightening fittings. - Safety gloves and goggles For protection during the process.
Step-by-Step Process
1. Measure the Length Start by measuring the existing brake pipes or determining the required length based on your vehicle’s specifications. Always account for bends and fittings when measuring.
2. Cut the Tube Using the tube cutter, carefully cut the brake pipe to the measured length. Ensure you make a clean cut to prevent leaks later on.
making brake pipes

3. Create Flares Using the flare tool, create a flare at each end of the cut pipe. This is essential for a secure connection with the fittings. Follow the manufacturer's instructions for the flare tool to achieve the correct angle.
4. Bend the Pipe Utilize the tube bender to create the necessary bends in the pipe. Aim for smooth curves to avoid kinks. It’s crucial to bend the pipe gradually and not exceed the recommended bend radius.
5. Install the Fittings Slide the fittings onto the ends of the pipes. Ensure that the flared ends are inserted properly before tightening them with a wrench. This is a key step to prevent brake fluid leakage.
6. Install the Brake Pipes Route the newly made brake pipes along the chassis, securing them in place with brackets if necessary. Ensure that they do not come into contact with any sharp edges or hot components.
7. Fill with Brake Fluid Once installed, fill the system with the appropriate brake fluid. Bleed the brakes to eliminate any air bubbles, which can compromise braking efficiency.
8. Test the System Before taking the vehicle back on the road, conduct a thorough inspection and a test drive at low speeds to ensure that the braking system functions correctly.
Conclusion
Making brake pipes is a detailed process that requires precision and careful handling. By following these steps and utilizing the right materials and tools, you can ensure that your vehicle's braking system operates safely and effectively. Regular checks and maintenance of the brake pipes can further enhance your vehicle's safety and performance, making it essential for every vehicle owner to prioritize this crucial aspect of their vehicle's upkeep.
