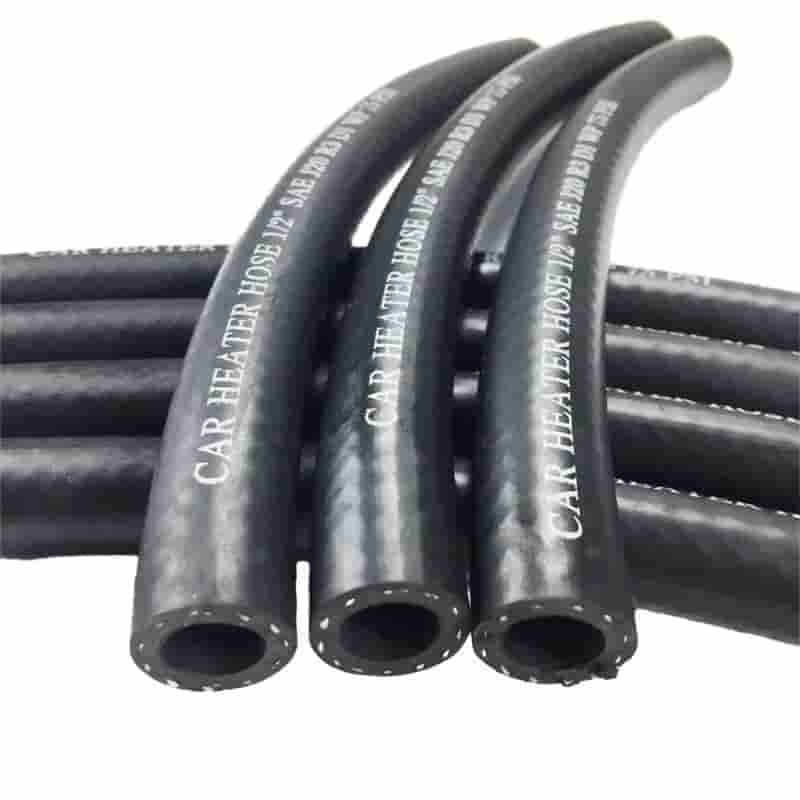
replacing heater core hoses
ኅዳር . 14, 2024 05:18 Back to list
replacing heater core hoses
Replacing Heater Core Hoses A Comprehensive Guide
The heating system in your vehicle plays a crucial role in providing comfort during colder months. One of the critical components of this system is the heater core, which heats the cabin air by using hot coolant from the engine. The heater core hoses connect the heater core to the engine, allowing coolant to flow in and out of the core. Over time, these hoses can wear out, crack, or develop leaks, causing the heating system to malfunction. This article will guide you through the process of replacing heater core hoses, ensuring your vehicle stays warm and comfortable.
Signs That Indicate You Need to Replace Heater Core Hoses
Before diving into the replacement process, it's essential to know the signs that indicate your heater core hoses may need replacement. Look out for the following symptoms
1. Coolant Leaks If you notice a puddle of coolant under your vehicle, especially near the dashboard or passenger side, it could point to a failing hose. 2. Overheating Engine Inadequate coolant flow can lead to engine overheating. If you suspect this is happening, inspect your hoses for damage. 3. Foul Odors A sweet smell in the cabin may indicate coolant leaking onto the heater core, possibly from a cracked hose. 4. Poor Heating Performance If your heated air feels lukewarm or cold, there may be an obstruction caused by a blocked or damaged hose.
Tools and Materials Needed
Before replacing the heater core hoses, gather the necessary tools and materials
- New heater core hoses (ensure they are compatible with your vehicle) - Hose clamps (if not included with new hoses) - Screwdriver - Pliers - Bucket for catching coolant - Rags for cleanliness - Safety goggles and gloves
Step-By-Step Guide to Replacing Heater Core Hoses
Step 1 Preparation
Begin by allowing your vehicle to cool down completely. This is important as the coolant system operates under pressure and hot coolant can cause burns. Once cooled, wear your safety goggles and gloves for protection.
Step 2 Release Coolant Pressure
Open the hood and locate the radiator cap. Carefully release the pressure by turning the cap slowly to allow any built-up steam or pressure to escape. Once relieved, remove the cap completely.
replacing heater core hoses

Step 3 Drain Coolant
Position a bucket under the radiator and open the drain valve (if available) to allow coolant to flow out. If you don't have a drain valve, disconnect the lower radiator hose from the engine to drain the coolant. Ensure you dispose of the used coolant responsibly according to local regulations.
Step 4 Locate and Remove Old Hoses
Once the coolant has been drained, locate the heater core hoses. These are usually positioned near the firewall and can be identified by following the hoses from the engine to the heater core. Using pliers, loosen the hose clamps and slide them away from the hoses. Gently twist and pull the old hoses to disconnect them from the heater core and the engine.
Step 5 Install New Hoses
Take your new heater core hoses and ensure they are the correct length and diameter. Push one end of each hose onto the heater core and the other end onto the engine fittings. Ensure a snug fit, then secure them using the hose clamps. Tighten the clamps evenly to prevent future leaks.
Step 6 Refill Coolant
Once the new hoses are securely in place, refill the radiator with the appropriate coolant mixture. Start with 50% antifreeze and 50% water, or use pre-mixed coolant as per your vehicle's specifications. After this, replace the radiator cap.
Step 7 Test the System
Start the engine and let it run for a few minutes while monitoring the temperature gauge. Check for any leaks around the new hoses and ensure that hot air flows from the heating vents. If everything looks good, allow the engine to run until it reaches operating temperature.
Conclusion
Replacing heater core hoses is a manageable task for those with basic automotive knowledge. By following this guide, you can ensure that your vehicle’s heating system remains functional and efficient, providing warmth during the chilly months. Regular maintenance and timely replacement of worn components will enhance your vehicle’s performance and extend its lifespan. Remember, if you encounter any difficulties during the process, it’s always wise to consult a professional mechanic.
