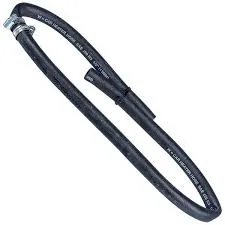
making your own brake lines
ጥቅም . 21, 2024 12:49 Back to list
making your own brake lines
Making Your Own Brake Lines A Step-by-Step Guide
Creating your own brake lines for your vehicle can be a rewarding project that not only enhances your automotive skills but also allows you to customize your braking system. Whether you’re restoring an old car or modifying your current vehicle, making your own brake lines can save you money and provide a sense of accomplishment. Here’s a step-by-step guide to help you through the process.
Materials Needed
Before you begin, gather the necessary materials - Copper or stainless steel brake line tubing - Brake line fittings - A flaring tool - A tubing cutter - A bending tool (if needed) - Brake fluid - A brake bleeder kit - Safety goggles - Gloves
Step 1 Assess Your Needs
Start by determining the length and routing of the brake lines. Measure the existing lines or consult your vehicle’s manual for guidance. It’s essential to ensure that the new lines will not interfere with any moving parts and have enough clearance from heat sources.
Step 2 Cut the Tubing
Using a tubing cutter, carefully cut the brake line tubing to the required lengths. Make sure the cuts are straight and even to avoid leaks down the line. Always wear safety goggles to protect your eyes from metal shavings.
Step 3 Create Flare Ends
Next, you’ll need to create flare ends on the brake line tubes. This is where the flaring tool comes in. Follow the instructions of your flaring tool to create a double flare, which is essential for providing a secure and leak-proof connection at the fittings. Take your time with this step, as a poorly made flare can lead to brake failure.
making your own brake lines

Step 4 Install Fittings
Once your flares are complete, slide the appropriate fittings onto the ends of the brake lines. Ensure they are compatible with your vehicle’s brake system. Carefully thread the fittings onto the flared ends, ensuring a tight fit without over-tightening, which could damage the flare.
Step 5 Shape the Lines
Using a bending tool, shape the brake lines as needed to follow the existing routing in your vehicle. Make gentle bends to avoid kinks, which can restrict fluid flow. Ensure that the lines do not rub against any sharp edges or moving components.
Step 6 Install the Brake Lines
With the lines correctly shaped and fitted, it’s time to install them on your vehicle. Secure them in place using the existing mounting clips or clamps. Ensure all connections are tightened and leak-free.
Step 7 Bleed the Brake System
Finally, you’ll need to bleed the brake system to remove any air bubbles that may have entered during installation. Use a brake bleeder kit for this process, following the appropriate bleeder sequence based on your vehicle’s setup.
Conclusion
By making your own brake lines, you gain valuable hands-on experience while ensuring that your vehicle's braking system is customized to your specifications. Always prioritize safety, as brake systems are critical to vehicle functionality. If in doubt, consult with a professional mechanic. With patience and attention to detail, you'll have a reliable brake system to keep you safe on the road.
